Data: UPD 8th November 2023
Creative DiVi Cam 4X DIGIT Camcorder PDF Quick Start (Updated: Wednesday 8th of November 2023 10:54:05 PM)
Rating: 4.5 (rated by 48 users)
Compatible devices: ZEN NOMAD JUKEBOX NX, PC-CAM 600, Vado HD 3, ZEN Zen X-Fi 8GB, Vado HD 3rd Gen, Vado HD, Vado, ZEN X-Fi.
Recommended Documentation:
Text Version of Creative DiVi Cam 4X DIGIT Camcorder Manual (Summary of Contents)
(Ocr-Read of Document's Main Page, UPD: 08 November 2023)
F
/
3
.
0
,
f
=
8
.
3
4
m
m
4
X
D
I
G
I
T
A
L
Z
O
O
M
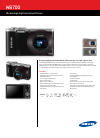
About Your Camera
Add a new dimension to your communication with family and friends, and use Live Video Chats with your camera!
To use Live Video Chats, download one of the following:
.
MSN Messenger from http://messenger.msn.com
.
Yahoo! Messenger from http://messenger.yahoo.com
.
any Microsoft® Windows® application that supports Live Video Chats, like Windows NetMeeting
Using Instant Live Video Chats
Keep this document for future reference.
Product Registration
Creative Knowledge Base
Enjoy a host of benefits by registering your product during installation, or at www.creative.com/register.
Benefits include:
· Service and Product Support from Creative
· Exclusive updates on promotions and events
Please note that your warranty rights are not dependent on product registration.
Resolve and troubleshoot technical queries at Creative's 24-hour self-help Knowledge Base.
Go to http://www.creative.com and select your region.
User’s Manual
For more details on using your camera, read the User’s Manual.
Rear ViewFront View
Menu button
Power
switch
Playback
button
PN: 03VF014000000 Rev A
2
2
F
45
C
113
Copyright © 2004 Creative Technology Ltd. All rights reserved. Microsoft and Windows are registered trademarks of Microsoft Corporation.
All other brand and product names are trademarks or registered trademarks of their respective holders and are hereby recognized as such.
For Microsoft® Windows® Millenium Edition and Windows 98 Second Edition users only
1. Connect the one end of the USB cable to your camera, and the other end to your computer’s USB port.
2. On your Windows desktop, right-click the My Computer icon.
3. Click the Device Manager tab.
4. Double-click Disk Drives,
5. Right-click GENERIC IDE DISK TYPE 47, and then click Properties.
6. In the GENERIC IDE DISK TYPE 47 Properties window, select the DMA checkbox.
7. Click the OK button.
Battery cover
Memory card
slot cover
Display/Help
button
Flash
Lens
USB port
TV Out port
Headphone
jack
Mode
dial
SpeakerMacro
switch
Shutter/Record
button
Scroller
Multi-select
button
Microphone
LED LCD screen
Installing Software
1. If you accidentally begin installation with your camera connected, the Add New Hardware Wizard or
Found New Hardware Wizard dialog box may appear.
Click the Cancel button and disconnect your camera from your computer.
2. Insert the Installation CD into your CD-ROM/DVD-ROM drive.
Your CD should start automatically. If it does not, follow the steps below:
i) Start Windows Explorer.
ii) On the left pane, click the My Computer icon.
iii) Right-click the CD-ROM/DVD-ROM drive icon, and then click Au toPlay.
3. When prompted for the software to install, click the Install button next to the Driver box.
4. Follow the instructions on the screen.
5. When prompted, restart your computer.
Installing Hardware
1. Connect one end of the USB cable to your camera, and the other end to your computer’s USB port.
The camera turns on.
2. Move the scroller up or down and scroll-select "PC Camera" or "Mass Storage" option to use your camera as
a webcam or as a mass storage device.
Tip : To "Scroll Select", use the Scroller to scroll to the option you want, and select the option by pressing
the Scroller.
Installing Software and Hardware
DO NOT connect your camera to your computer before setting up the software.
Proper Handling
Quick Start
1. Open the battery cover
4. Insert an SD memory card (optional)
2. Insert the batteries
Note the polarity of the AAA batteries when
inserting them.
3. Close the battery cover
5. Turn on your camera
Slide the power button downwards to turn on
your camera. The LED lights up in red for a few
seconds and the LCD screen turns on.
Setting Up Your Camera
1
1
F
/
3
.
0
,
f
=
8
.
3
4
m
m
4
X
D
I
G
I
T
A
L
Z
O
O
M
F
/
3
.
0
,
f
=
8
.
3
4
m
m
4
X
D
I
G
I
T
A
L
Z
O
O
M
3
3
Using Your Camera
Tip: Press the Display/Help button to see a button help
screen for the current mode.
4. To zoom in or out, move the scroller up or down.
5. Compose your picture and press the Record button
halfway to bring your subject into focus. A red bracket
appears in the center of the LCD.
6. Fully press the Record button and release it when the
camera beeps.
The beep lets you know that you have taken a picture.
Previewing a Picture
1. Turn the Mode dial to .
2. Press the Playback button.
3. Use the scroller to locate the picture on the LCD screen.
4. To exit, press the Playback button.
Recording a Video
1. Make sure that your camera is not connected to your
computer.
2. Turn on your camera.
3. Turn the Mode dial to .
4. Compose your picture and press the Record button to
begin recording.
You can see the elapsed recording time, in seconds,
shown on the LCD screen.
5. To stop recording, press the Shutter button.
Playing a Video
1. Turn the Mode dial to .
2. Press the Playback button.
3. Use the scroller to locate the video on the LCD screen.
4. Press the scroller to play the video.
5. To stop playback, press the scroller again.
6. To exit, press the Playback button.
Taking a Picture
1. Make sure that your camera is not connected to your
computer.
2. Turn on your camera.
3. Turn the Mode dial to .
For normal pictures, make sure that the Macro switch
is moved toward .
For close-up pictures, move the macro switch to .
Recommended:
Z 6.0, 73654, ZNT6-H, LIM 1
NV-GS11, TrackSnap TS-DSC-S40-01, Digital Palmcoder PalmSight PV-DV100, HV10 - Camcorder - 1080i, NV-GS400GC
-
Ideal for . . .IntelligentTrafficsony.com/videocameras click: sony.com/sonysports© 2010 Sony Electronics Inc. All rights reserved. Reproduction in whole or in part without written permission is prohibited. Features and specifications are subject to change without notice. ...
Model & Doc Type: FCBEX1000P 4
-
Digital PallTi(:opdcr" Panasonic oPain)Sight"Digital Video CamcorderO_erating Instructionsao e,No,PV-DV100Before attempting to connect, operate or adjust this product, please read theseinstructions thoroughly.Spanish Quick Use Guide is included.Guia para r6pida consulta en espa ...
Model & Doc Type: Digital Palmcoder PalmSight PV-DV100 72
-
Cwww.canondv.com∂Not Just Video and Photos...the Best of Both.Genuine Canon Optics14xOpticalZoom Lens/280x Digital Zoom:What sets a Canon camcorder apart from allthe others? It’sthe onlycamcorder made by a company renowned for high-qualityprofessional optics. The ZR400’s opticalzoom delivers s ...
Model & Doc Type: ZR400 2
-
■ Thank you for purchasing this digitalOlympus camera.■ Before you use this camera, read thismanual carefully.■ We recommend that you spend some timetaking test shots and experimenting withall of the features before you takeimportant pictures.InstructionsVT1621-01OLYMPUS OPTICAL ...
Model & Doc Type: E10 - CAMEDIA E 10 Digital Camera SLR 203
Operating Impressions, Questions and Answers: