Contact Information:
949-453-8782
23 Hubble
Irvine, CA 92618
USA
www.iogear.com
[email protected]
Thank you for purchasing IOGEAR’s
®
ION™ Drive featuring TRI-Select Backup
Technology, one of the fastest Hi-Speed external Hard Drives on the market.
IOGEAR
®
only manufactures high quality storage devices, so we are sure you will be
satisfied with your purchase. IOGEAR
®
is dedicated to customer service and
satisfaction, and wishes you the best with your new TRI-Select ION™ drive.
Once again, IOGEAR
®
brings the cutting-edge technology of today and tomorrow to
your Macintosh or PC.
Note:
Your order has been carefully packaged and inspected, and we hope you are
pleased with the IOGEAR product you purchased. Please inspect the contents of the
package to ensure that you have received all items and that nothing has been
damaged. If you discover a problem, please contact your dealer immediately for
assistance
WARNING!
Your IOGEAR ION™ Drive is ESD sensitive, and can be damaged by static electricity! Please
follow proper and safe ESD handling procedures when connecting the ION™ Drive to your
computer.
Please visit http://www.esda.org for information about Electro-Static Discharge.
1. Welcome
2. Hardware Requirements
To access FireWire® or USB 2.0 speeds, the computer system must be FireWire®
and/or Hi-Speed USB 2.0 enabled. The Tri-Select ION™ Drive will work at
FireWire® 400 and/or USB 1.1 speeds with FireWire® enabled and/or USB 1.1
enabled computers.
For Mac Users
• Mac OS X (10.2) or greater
• Available FireWire port
• Available USB 2.0 or 1.1 port
For PC Users
• PC Compatible, 200MHz or greater
• Windows® 98SE*, ME*, 2000, XP
• Minimum 64MB RAM
• Available Hi-Speed USB 2.0, 1.1 port or FireWire port
• CD-ROM drive
*Drivers are provided by the supporting OS or host card software.
FireWire 400 - Mac OS X(10.2) or greater, Windows 98SE, ME, 2000 & XP
USB 2.0 - Mac OS X (10.2) or greater, Windows 2000 & XP
USB 1.1 - Mac OS X(10.2)or greater, Windows 2000 & XP
Accessories / Additional Products
8-in-1 Hi-Speed USB 2.0 Memory Bank™(GFR280)
KVMP™ Extreme Switch – 2 and 4 port USB PS/2 KVMP™ switch (GCS1732/34)
BOSS™, Router, FTP Server, NAS, VPN end point (GNS1000)
3. Features
• Transfer or backup pictures, music, and data at speeds up to 480 Mbps
– Transfer 1 GB in under 30 seconds
• 3-Button Backup Solution that automates backups with Dantz
Retrospect Backup software
• Ideal for backup, storage expansion, file sharing, software installation,
and data management
• 3 connectivity solutions in one (FireWire® 400, USB 2.0, and USB 1.1)
• Hot-plug capable, hot swappable, and Plug-N-Play
• Preformatted for your convenience so you are up and running in no
time (for those with preinstalled drives)
• FireWire® interface supports data transfer rates of up to 400 Mbps
• USB 2.0 interface – supporting high speed data transfer rates of up to
480 Mbps
• One-year limited warranty
4. Pictorial Introduction
T
R
I
-
S
E
L
E
C
T
ION
1
2
Front View
1. The IOGEAR® Logo - a mark of quality.
2. Tri-Select Backup Buttons
Back View
POWER
ON / OFF
1
2
3
4
6
5
1. USB 2.0 Type B Port (female)
2. FireWire 6-pin Ports (female)
3. Power Switch
4. Power Port
5. Lock Port
6. Stand (optional, screws included)
5. ION™ Drive Setup
If you purchased an enclosure without a pre-installed Hard Drive please see page
10 in the manual on the CD on installing your hard drive.
Firewire Installation
(It is not necessary to install a driver for FireWire under any OS, however
please make sure your computer has all of the latest updates, critical
updates, service packs, service releases, OS patches, security updates,
and all other OS updates provided by the respective developers.)
Note: Before you begin, please make sure that the power to the device
and your computer has been turned off.
Step. 1
Step. 2
POWER
ON / OFF
1
2
Plug the FireWire 6 pin connector into the
back of the ION™ Drive.
Plug the Power Adapter into the back of the
ION™ Drive (you must connect the power
adapter in order to utilize the drive).
Step. 3
Step. 4
Step. 5
3
Plug the FireWire® 6 pin connector into your computer’s
FireWire Port.
Note: if your computer has a 4 pin
FireWire® or iLink® connection please use
a FireWire 4 pin(m) to 6 pin(m) cable.
IOGEAR part# G2L13946-6; or you may
pick one up at any local electronics store
or catalog reseller.
4
Plug the power adapter into a
surge protector.
Once complete, turn the ION™
Drive and your computer on.
Your computer will automatically
identify the ION™ Drive and
load all necessary drivers.
POWER
ON / OFF
1
2
Step. 1
Step. 2
Note: Before you begin, please make sure that the power to the
device and your computer has been turned off.
Plug the USB Type B connector into
the back of the ION™ Drive.
Hi-Speed USB 2.0 Installation
Plug the Power Adapter into the back
of the ION™ Drive (you must connect
the power adapter in order to utilize
the drive).
Step. 3
Step. 4
Plug the USB Type A connector into your
computer’s USB 2.0 Port.
3
Plug the power adapter into a surge
protector.Once complete, turn on ION™ Drive and
your computer on. Your computer will automatically
identify the ION™ Drive and load all the necessary
drivers.
6. Installation of ION™ Drive Software (PC)
For Windows® 98SE Users Only
Inserting the CD will launch the software
installer. Clicking on the first button will
copy the installer of the driver to your
internal hard drive.
Step. 1
Step. 2
Step. 3
The installer will be copied into
“C:\IOGEAR GHD335C”. Double-click
on the installer icon to begin the driver
install.
Click [Next] to begin the install.
7. Dantz Retrospect Express & Tri-Select
Button Management Software
Step. 4
The next screen will ask you to click
[Finish] to end the wizard. After the wizard
has quit you simply need to connect the
ION Drive to the computer and the driver
will be loaded for the drive.
Dantz Retrospect Express and the TRI-Select Button Management Software work
together to provide you with up to three backup options (per drive) at the touch of a
button. The TRI-Select Button Management Software connects your drive and its
buttons with Dantz Retrospect Express. This section will take you through the
installation and setup of both the TRI-Select Button Management Software and
Dantz Retrospect Express, once you have finished you should have three full backup
scripts setup and ready to go.
Installation (PC)
From the Software CD installer click on the appropriate buttons to install Dantz
Retrospect Express and the TRI-Select Button Management Software separately.
Each will launch and installer that will step you through the process. Please install
the Dantz software and the TRI-Select software, once complete please restart your
computer.
1
Once your computer has restarted you should find an
IOGEAR icon
1
in your systray, click on it to begin
using the TRI-Select Button Management Software.
Installation (Mac)
On this CD you will find two folders. Inside
the Dantz Retrospect Express folder you will
need to choose from your appropri ate
language and launch the installer. Inside the
TRI-Select folder simply run the installer and
then restart your computer.
After your computer restarts you can begin
using the TRI- Select Butt on Manageme nt
Software. You will find it in your application
folder.
TRI-Select Button Management Software Introduction
The TRI-Select Button Management Software allows you to configure each button for
your custom backup sets as you wish. The Button Management Software identifies
each disk for you by drive letter
1
and serial number
2
. When selected the drive letter
and serial number are red and you can begin configuring the buttons. Each button is
identified by the shape that appears on it. The top button is the square
3
, the middle
button is the circle
4
and the bottom button is the triangle
5
.
In the software you will see a box
6
next to each shape, this is where the path to the
selected backup script will be displayed. To choose a backup script for that button you
want to click on the folder icon
7
below its box. If you ever decide you no longer want
that button active simply click the red X
8
next to the folder icon and it will clear the box
of your selected path.
Whenever you have a drive connected you want the TRI-Select Button Management
Software active so be sure to minimize rather than close it whenever you are done
using it. If you connect a new drive and want to configure its buttons be sure to click
the Refresh button
9
and the software will scan for all new drives and list them as it
finds them.
1
2
3
4
5
6
7
8
9
8. TRI-Select Button Setup w/Dantz Retrospect
Button 1 (Mac & PC)
To begin setting up the square (top) button on your TRI-Select ION Drive simply press
the button on the drive. At this point Retrospect Express should launch and begin the
backup set tutorial, to begin click [Next].
Choose the volume you want to
backup from, and click [NEXT]
to continue
Step. 1
Choose what you want backed up,
backing up your “Documents only”
will backup all the documents in your
hard drive. Choosing “Entire volume”
will backup you entire hard drive.
When you have chosen click [Next] to
continue.
Step. 2
Step. 3
Step. 4
Choose your appropriate TRI-Select
ION Drive as the destination. Once
you have chosen click [Next] to
continue.
Finally you can click [Finish] to
complete the setup or you can click
[Start Now] to complete the setup
and begin the backup now.
Otherwise you can initiate backup
by pressing the button.
Buttons 2 & 3 (PC)
To begin setting up the next two buttons, launch Dantz Retrospect from your
Programs Folder in your Start menu.
First click on the new script icon
1
in the upper left of the tool bar,
then choose what kind of backup
script you would like to make. Your
choices are “Backup”, “Duplicate”
or “Archive”. Then Retrospect will
ask you to name your script, do so
and click [NEW].
Step. 1
Step. 2
1
Then it will prompt you to choose
your Source(s) and Destination.
Click on [Sources] to begin.
Step. 3
Step. 4
Step. 5
Your source is the folder and files you
want backed up. When you are finished
selecting everything you want to backup
then click [OK].
Click on [Destinations] and it will
prompt you to choose your
destinations(s). For your first
script you will have to click [Creat
New] to add a destination option.
It will then ask what type of media
you want to back up to, to backup
your ION Drive choose “Disk”,
click [Next] to continue.
Name your Disk Backup Set and click
the [Select…] button to choose a disk
as your destination, click [OK] after you
have selected your disk, then [Next] to
continue.
Step. 6
Step. 7
Step. 8
Choose an encryption type, you
can choose from None,
Password only and
SimpleCrypt. Encryption will
protect your data so only you
can recover it as needed. Click
[Next] to continue.
Either use the default location for
your Disk Backup Set or click
[Browse…] to choose your own.
Click [Next] to continue when you are
ready. Then click [Finish] on the next
screen to complete your Disk Backup
Set.
Now choose your Disk Backup Set
from in the window and click [OK].
Step. 9
Step. 10
If you wish, you can click the
[Selecting…] button to filter what
kind of files are backed up. By
default, Retrospect will backup “All
Files” from your specified
destination. Once satisfied with
your backup, just click on the Run &
Save
1
icon at the top.
Now choose Make a “run
document” from the choices and
click [Save…]. Retrospect will
then prompt you to save the
script in your desired location.
Please choose your desired
location and save the script.
Now that you’ve finished your script you can choose to run it from one of the buttons
on your TRI-Select ION Drive. To do so, open up the TRI-Select Button Management
Software and decide which button you want to run your script from. Then click on the
appropriate folder icon to pick the script from the location you saved it to. Once you
have selected the script as the launch item for a specific button you will be able to run
that backup script any time you want to by pressing that button on the drive.
To setup another script go back to the beginning of Dantz Retrospect Setup.
For more information, advanced techniques and other uses of Dantz Retrospect
Express refer to the Manual in the Dantz Retrospect folder which is located in your
Program Files folder.
Buttons 2 & 3 (Mac)
Go to the Automate tab in the
Retrospect Express Directory window
and click on the EasyScript button.
Then you will see the Welcome to
EasyScript window, please click [Next]
to continue. EasyScript will ask to you
select your type of media, to backup
to your Tri-Select ION drive please
select “File backup set (hard disk)”
from the list and click [Next] to
continue.
The next window will ask you what
frequency you want the backup to
happen, choose Once a week and
click [Next] to continue. Then in the
next window choose a time for the
script to run and click [Create…] to
continue.
Step. 1
Step. 2
Step. 3
Step. 4
Step. 5
Then name your backup set and click
[New…] to continue. Then choose the
location, make sure to choose the Tri-
Select ION drive as the location and
click [Save] to continue.
In the next window EasyScript will
announce that you are finished.
Please click on the [Open Script]
button to continue. Then it will open
the main script window that will allow
you to verify all the settings.
Step. 6
Step. 7
The [Sources] button will allow to modify
the data that is backed up. The
[Destinations] button should not need to be
changed, but it determines where the data
will be backed up. The [Selecting] button
will allow you to filter the types of files you
want to backup from your location. The
[Options] button lets you choose whether you want your data verified and
compressed or not. The [Schedule] button tells you when the script is scheduled to
run. If you do not want the script to run on a schedule please press the [Schedule]
button and delete the schedules in the next window. The script window should look
something like this when you are done.
Finally, in the menu bar go to “Script”
and select “Save and Run…”, in the
window that opens chose “Make a
run document” and click [Save…]
and choose the location for the script
to be saved.
Now that you’ve finished your script you can choose to run it from one of the buttons
on your TRI-Select ION Drive. To do so, open up the TRI-Select Button Management
Software and decide which button you want to run your script from. Then click on the
appropriate folder icon to pick the script from the location you saved it to. Once you
have selected the script as the launch item for a specific button you will be able to run
that backup script any time you want to by pressing that button on the drive.
To setup another script go back to the beginning of Dantz Retrospect Setup.
For more information, advanced techniques and other uses of Dantz Retrospect
Express refer to the Manual in the Dantz Retrospect folder which is located in your
Applications folder.
WARNING!!! This equipment generates, uses and can radiate radio frequency
energy and, if not installed and used in accordance with the instruction manual, may
cause interference to radio communications. This equipment has been tested and
found to comply with the limits for a Class B computing device pursuant to Subpart J
of Part 15 of FCC Rules, which are designed to provide reasonable protection
against such interference when operated in a commercial environment. Operation of
this equipment in a residential area is likely to cause interference, in which case the
user at his own expense will be required to take whatever measures may be required
to correct the interference.
Radio & TV Interference Statement
Limited Warranty
N NO EVENT SHALL THE DIRECT VENDOR’S LIABILITY FOR DIRECT,
INDIRECT, SPECIAL, INCIDENTAL
OR CONSEQUENTIAL DAMAGES RESULTING FROM THE USE OF THE
PRODUCT, DISK, OR ITS DOCUMENTATION EXCEED THE PRICE PAID FOR THE
PRODUCT.
The direct vendor makes no warranty or representation, expressed, implied, or
statutory with respect to the contents or use of this documentation, and especially
disclaims its quality, performance, merchantability, or fitness for any particular
purpose.
The direct vendor also reserves the right to revise or update the device or
documentation without obligation to notify any individual or entity of such revisions, or
updates. For further inquires please contact your direct vendor.
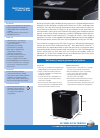
3.5" Tri-Select™ COMBO ION™ Drive
High-Speed External Hard Drive
Featuring Dantz Retrospect Backup Software
Quick Start Guide (3.5" FireWire / USB 2.0 Tri-Select Backup ION™ Series)
Read this guide thoroughly and follow the installation and operation
procedures carefully to prevent any damage to the unit and/or any of the
devices it connects to.
Please refer to the electronic manual on the IOGEAR CD for further
instructions on your new ION™ Drive.
Package contains:
1 - 3.5” ION™ Drive featuring TRI-Select Backup Technology
1 - Base (with screws)
1 - Hi-Speed USB 2.0 (Type A to Type B) Cable
1 - FireWire® (6 pin – 6 pin) cable
1 - Power Adapter
1 - Power cable
1 - Quick Start Guide
1 - IOGEAR® Installation CD with Electronic Manual
1 - Warranty / Registration Card
Copyright © 2004 IOGEAR
All brand names and trademarks
are the registered property of their
respective owners
PKG-M0061/QS
The TRI-Select Button Management Software in your start menu under Programs.
On a Mac, there will be a TRI-Select folder installed into your Applications folder.
1
Front
Back
98 mm
120 mm