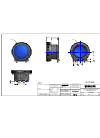
Manual, Installation Instructions for Navitar 356MCL012 Projector Accessories (1 pages)
Data: UPD 27th February 2024
Navitar 356MCL012 Projector Accessories PDF Installation Instructions (Updated: Tuesday 27th of February 2024 01:18:42 PM)
Rating: 4.5 (rated by 91 users)
Compatible devices: 635MCL024, 376MCZ151, 594DLP151, 880MCZ087, 491MCZ500, 850MCL012, SSC065, 374MCZ125.
Recommended Documentation:
Text Version of Navitar 356MCL012 Projector Accessories Manual (Summary of Contents)
(Ocr-Read of Document's Main Page, UPD: 27 February 2024)
Installation of Navitar NuView Series 356 lens on Sony model VPL-PX21, PX30,
PX31, PX32, FX50, FX51 & FX52 projectors.

TOOLS REQUIRED: PHILLIPS HEAD SCREWDRIVER

Disassembly:

1.  Disconnect unit from power source.

2.  To remove the top plate, slide a flat head screw driver or any hard, flat object in the
slot at the back of the plate, push down gently, then slide the plate forward.  Set the
plate aside.

3.  The lens should now be exposed.  Looking down from above locate and remove the
four screws (two on either side of the lens) that hold the prime lens in place.  Lens
should now slide forward out of the projector freely.  Set the prime lens aside.

4.  If you are installing a 356MCZ500, proceed directly to step #6.  For all other lenses
continue with step #5.

5.  You must remove the top cover of the projector.  To do this, locate and remove two
screws on the left side of the projector and two screws on the right side.  Next, locate
and remove two small upward facing screws that were underneath the top plate, one
on each side of the opening, towards the front.  The entire top cover should now lift
off, though it will still be attached by wires.  Set it out of your way.

6.  Looking down from above locate and remove two small screws just inside the front
corners, left and right, securing the front cover to the main projector body.  Lift the
front of the projector up slightly to take the weight off the front feet and slide the front
cover off.  Looking at the inside of the front cover you will see two small screws
holding a crescent shaped plate just beneath the lens opening.  Remove these two
screws and the crescent plate.  Set them aside with the prime lens (you will not be
reinstalling them until you reinstall the prime lens).  Re-secure the front cover with the
two screws on the inside of each corner, then replace the entire top cover, using the
same screws as before in reverse order.

Assembly:

1.  Re-secure the front cover with the two screws on the inside of each corner, then
replace the entire top cover, using the same screws as before in reverse order.

2.  Gently place the Navitar lens into the cradle. Using the same four screws that held
the prime lens in place secure the Buhl lens. Replace the top plate that covers the
lens by setting it in place and sliding it backwards.

3.  To focus, gently twist the front of the lens.  To zoom, loosen thumbscrew and twist
the knurled zoom ring. Re-tighten thumbscrew.  CAUTION:  When focusing, be sure
not to twist lens completely out of the adapter!
Recommended:
DXZ475MP, E24FF, CF-62 Series, PF3-1000
Homescreen, LP70+, LP240, NP-02HD, 583MCL047
-
Zero-G (Flush)Installation InstructionsINSTALLERS: PLEASE LEAVE THIS MANUAL WITH THE OWNER.ZERO-G DISCLAIMER• Do not use a knife to cut foam/wrapping, you may cut cables.• Due to the complexity of Zero-G, please scan the QR code to review the installation video before proceeding ...
Model & Doc Type: Zero-G 54
-
Rev111010-ESC www.elitescreens.com How to replace a Kestrel Series circuit board 1. Raise the screen about 2 feet, and then unplug the power cord. VERY IMPORTANT: Use rope to tie the screen from both ends after raising it. When removing the end cap, the screen wi ...
Model & Doc Type: Kestrel Series 7
-
Installation of Navitar/ NuView Series 374 lens on Eiki model LC-X6 & LC-SX6 projectors. TOOLS REQUIRED: PHILLIPS HEAD SCREWDRIVER Disassembly: 1. Disconnect unit from power source. 2. Remove front cover by removing 2 Phillips screws from bottom of lower cover. Remove 4 remaining Ph ...
Model & Doc Type: 374MCZ125 1
-
adjust projector settings1 getting startedThis Quick Start Guide has been designed to help you quickly getting started using your new projector. If you require further help, or have questions on the details of how to operate this unit, please refer to our web site in order to download the ...
Model & Doc Type: F50 2
Operating Impressions, Questions and Answers:


