AR-68Page 9 AR-68Page 10
IMPORTANT SAFETY INSTRUCTIONS
AR-68Page 11
PREPARATION FOR USE
AR-68Page 12
AR-68Page 13 AR-68Page 14
AR-68Page 15 AR-68Page 16
ENGLISH ENGLISH
ENGLISH
ENGLISHENGLISH
ENGLISHENGLISH
BEFORE WE BEGIN
Thank you for purchasing the AKAI AR-68 a transistor with digital tuner, with USB port,
and with SD/MMC and Micro SD (TF) card reader. This is your assurance of quality,
performance and value. This product was manufactured using the highest quality components
and standards of workmanship. Our engineers have included many useful and convenient
features in this product. Please be sure to read this instruction Manual completely to make sure
you are getting the maximum benefit from each feature.
It was tested by inspectors and found to be in perfect working order before it left our factory.
If, after reading this manual, you experience any problems with the operation of this product,
please refer to the instructions for obtaining services at the end of this Manual.
For future reference, record the serial number in the space provided.
Model No: AKAI AR-68
Serial Number:
This product was imported by the Company: DEMSA S.A.S.
For any questions concerning the conformity of the product, thank you to send your request to:
EXCLUSIVE IMPORTER
DEMSA S.A.S.
28, Boulevard Zéphirin Camélinat
92230 GENNEVILLIERS
FRANCE
IMPORTANT!
It is recommended not to leave a m obile phone near t he unit in order t o avoid electromagnet ic interference
in the speakers
PREPARATION FOR USE
UNPACKING AND SET UP
1 pc x AR-68 USB Cable
USB (female)
/ AC Adaptor
Rechargeable
battery
Instructions
Manual
DESCRIPTION OF THE UNIT
1. DISPLAY
2. POWER (ON/OFF)
3. MP3/RADIO
4. PLAY/PAUSE
5. PREVIOUS
6. NEXT
7. Numerical Keys (0 ~9)
8. VOLUME Control (VOL- /VOL +)
9. FM Antenna
10. AUX IN Jack
11. HEADPHONE Jack
12. SD/MMC Card Slot
13. DC IN 5V USB Cable connector
14. TF/Micro SD Card Slot
15. USB Connector
OPERATING INSTRUCTION
STANDBY MODE
SETTING THE CLOCK
1. Check the unit is in Standby Mode.
2. Press & hold numerical Key 1, twice for 2 seconds each time, to start clock setting.
3. To set the hours, press
(PREVIOUS) or (NEXT)
while the display is still flashing
.!
4. Press Numerical Key 1 on the front panel to start minute setting.
5. To set the minutes, press
PREVIOUS or NEXT
while the display is still flashing
.
6. Press Numerical Key 1 on the front panel to complete the clock setting.
SETTING THE ALARM
1. Check the radio is in Standby Mode.
2. Press & hold numerical Key 2, twice for 2 seconds each time, to start alarm setting.
3. To set the hours, press
(PREVIOUS) or (NEXT)
while the display is still flashing
.
4. Press numerical Key 2 to start the minute setting.
5. To set the minutes, press
(PREVIOUS) or (NEXT)
while the display is still flashing
.
6. Press numerical Key 2 each on the front panel to complete the alarm setting.
ENABLE OR DISABLE THE ALARM
Press and hold the numerical Key 3 to enable or disable the alarm function.
Press buttons
(PREVIOUS) or (NEXT) to enable the alarm (« A ON » will be displayed)
or to disable the alarm « A OFF » will be displayed.
To turn OFF the alarm, press MP3/RADIO button once.
USB, SD/MMC, Micro SD/TF Card OPERATION
The unit is designed to play MP3 audio files contained in a USB key, in an SD/MMC card or in your
Micro SD/TF card. If the files are not in MP3 format, the files cannot be read correctly.
1. Press and hold POWER button to switch on the unit into Standby Mode.
2. Press again on MP3/Radio button to switch into MP3 mode.
3. Before connecting the USB media or the SD/MMC/TF Card to t
he unit, make sure the port is in
the correct direction, insert straightly without bending.
4. The system will automatically start reading the MP3 files in the USB Storage Media, SD or MMC
Card, TF Card.
5. Press PLAY/PAUSE button to start or pause playback.
Press
(PREVIOUS) or (NEXT) buttons to select tracks in your playlist.
6. Press numerical keys to direct input the sound track sequence you wish to play.
WARNING!
1. Improper handling when inserting your USB drive, SD/MMC/TF card as for example insert your
media in the wrong way or with excessive force could damage the device.
2. The device cannot detect and read a locked SD/MMC/TF card.
AUXILIARY OPERATION
HEADPHONE JACK
Pay attention!
TECHNICAL SPECIFICATIONS
Model reference • AR-68
Power supply
• DC 5V input voltage 1A (via USB cable)
• AC 240V output through USB adaptor
Battery type and v oltage
• 3.7V 800mAh Li-ion rechargeable battery
• Output voltage : 3.7V
Battery charge/discharge
Charging time : • approx. 2hour30min to 3hours
Discharging time : • In RADIO play mode = approx. 6h30 to 7h30
• In USB play mode = approx. 2h30 to 3h00
• In SD / TF Card play mode = approx. 3h00 to 4h00
Power cons omption
• 600mAh max
Stan dby p ower cons umption
• 22mAh
Frequency coverage
• FM: 87.5MHz - 108 MHz
Audio ou tpu t p ower
• 1 x 1.3W RMS
Connections
• USB compatible Port 2.0
• SD/MMC READER
• MICRO SD (TF) CARD READER
• Auxiliary input 3.5 mm
• Headphone output 3.5 mm
Weight
• 0.16KG
Dimensions
• 118 x 30 x 78 mm (W
D
H)
IMPORTANT:
Due to continual revision and i mprovement on o ur products de sign, specificatio ns are subject
to change with out further notice.
RADIO OPERATION
1. Press and hold POWER button for 2 seconds, to switch ON the unit into STANDBY Mode.
2. Press RADIO/MP3 button once to enter into RADIO mode.
3. Press
(PREVIOUS) or (NEXT) button for a second to start radio scanning.
4. Adjust the sound volume by pressing VOL- or VOL+.
5. Press and hold POWER button for 2 seconds to switch OFF the radio.
Radio preset
1. Press and hold for 2 seconds PLAY button to start the AUTO-SCAN PRESET stations.
The AR-68 memorize automatically each time a radio station is found and can preset up to 50
stations. It will stop automatically when all the stations have been found.
2. Use the
(PREVIOUS) or (NEXT) button once to select one of the preset stations.
Input a station Radio
To improve FM reception
SLEEP FUNCTION
END OF LIFE DISPOSAL
This unit compli es with Europea n Council Directive 2006 / 95 CE
(Electromagneti c Compatibility & Low Voltage Directives)
If you want to dispose of this equipment, please do not use the ordinary dust bin!
- The presence of dangerous substances in the electrical and electronic equipments can have potential
consequences on the environment and human health in the cycle of reprocessing this product.
- Therefore, at the end of its lifetime, this product shall not be disposed with other non-recycled waste.
Used electrical and electronic equipment must be treated separately and in accordance with legislation
that requires proper treatment, recovery and recycling of used electrical and electronic equipment.
- Local authorities and resellers have set special procedures for the purpose of collecting and recycling this
product (please contact your local authority for further details). You have the obligation to use the
selective waste collection systems put in place by your local authority.
- If your used electrical or electronic equipment has batteries or accumulators, please dispose of these
separately beforehand according to local requirements.
- By disposing of this product correctly you will help ensure that the waste undergoes the necessary
treatment, recovery and recycling and thus prevent potential negative effects on the environment and
human health which could otherwise arise due to inappropriate waste handling.
Warning! This logo set on the product means that the recycling of this apparatus comes
within the framework of the Directive 2002/96/CE of January 27, 2003 concerning the
Waste of Electrical and Electronic Equipment (WEEE).
This symbol means that used electrical and electronic products should not be mixed with
general household waste. There is a separate collection system for these products.
The lightning flash with arrowhead symbol within an equilateral triangle is intended to alert the
user to the presence of uninsulated dangerous voltage within the product enclosure that may
be of sufficient magnitude to constitute a risk of electric shock to persons.
The exclamation point within an equilateral triangle is intended to alert the user to the presence
of important operating and maintenance (servicing) instructions in the literature accompanying
the appliance.
1. READ INSTRUCTIONS - All the safety and operating instructions should be read before the
unit is operated.
2. RETAIN INSTRUCTIONS - The safety and operating instruction should be retained for
future reference.
3. HEED WARNINGS - All warnings on the unit and in the operating instructions should be
adhered to.
4. FOLLOW INSTRUCTIONS - All operating instructions should be followed.
5. WATER AND MOISTURE - The unit should not be used near water, for example, near a
bathtub, washbowl, kitchen sink, laundry tub, swimming pool or in a wet basement.
6. VENTILATION - The unit should be situated so that its location or position does not
interfere with its proper ventilation. Do not place on bed, sofa, rug or similar surface that may
block the ventilation openings, in a built-in installation, such as a bookcase or cabinet that may
impede the flow of air through the ventilation openings. The normal ventilation of the product
shall not be impeded for intended use.
7. HEAT - The unit should be situated away from heat sources such as radiators, stoves, or
other unit (including amplifiers) that produce heat.
8. OBJECT and LIQUID ENTRY - Care should be taken so that objects do not fall and liquids
are not spilled into the enclosure through openings.
9. SERVICING - The user should not attempt to service the unit beyond that described in the
user operating instructions. All other servicing should be referred to qualified service personnel.
10. Power cord protection: Power supply cords should be routed so that they are not likely
to be walked on or pinched by items placed upon or against them, paying attention to cords at
plugs, convenience receptacles and the point where they exit from the product.
Notes:
1. Reduce volume before plugging the earphones/headphone.
2. Speaker of the unit is automatically disconnected while earphones/headphone
are connected.
3. Adjust the volume to a comfortable listening volume level.
Place your AKAI AR-68 on a flat and stable surface so that it cannot fall over.
• Carefully remove all the components from the carton and remove all packing materials
from the components. Make sure noting is accidentally discarded with the packing
materials.
• Save the carton and the packing materials, if possible, in the unlikely event that the
unit ever needs to be returned for service. Using the original carton and packing
material is the only proper way to protect the unit from shipping damage.
Battery Supply
Open the battery compartment and insert as indicated in the compartment the Rechargeable
Battery, Li-ion 3.7V supplied.
Battery Charging
Connect the unit by inserting the USB cable into DC 5V IN jack (13), and inserting the other
end into the USB interface or USB charger. The charging time is around 2h30 to 3 hours. The
charging indicator will flash during battery charging.
To use 5V AC/DC adapter for external DC charging, insert the small end of USB cable into the
DC 5V IN jack and the other end of USB cable into the USB/AC adaptor. Plug the adaptor into
AC wall outlet. Do not charge the battery with the AC/DC adaptor for more than 24 hours.
Battery precautions
• If the unit has not been used for a long period of time, the rechargeable battery may
be completely discharged into a “sleep mode” condition. This is the characteristics of all
the rechargeable battery. For the first time to recharge (to wake up) the battery, it is
recommended to charge for a period exceed 5 hours but not exceed 24 hours.
• Use only the supplied rechargeable battery.
• Warning: The battery shall not be exposed to excessive heat such as sunshine, fire or
the like.
AC/DC operation precautions
1. For AC operation, make sure the voltage is compatible. Always use the provided AC/DC
adaptor; never use other adaptor.
2. Always disconnect the AC power cord from the AC power source when it is not in use or
when DC power is operating.
1. Press & hold POWER button for 1 second to power on the unit.
2. The unit switches to Standby Mode automatically.
Press numerical keys to direct input the frequency of Radio Station you want to play. The unit
will tune to the entered radio station immediately.
Pull out the telescopic aerial to improve the FM Reception. If the FM-signal is too strong (very
close to a transmitter) reduce its length.
If you want to listen to radio or MP3 music files while fall asleep, you can use sleep function.
With the radio on (or MP3 music play), press and hold numerical key 4 to enter into the sleep
mode “SL 15”“will flash on the display.
Press and hold 4 numerical key to select the desired sleep time. The sleep timer will change by
15 minutes each time from 15 minutes to 90 minutes.
The unit will stop playing when the timer countdowns from the preset sleep time to the end and
then switch off by itself.
AUX jack allows you to connect an external music player or an external sound source to the
AR-68.
1. Plug a 3.5mm audio cable (not included) into your external music player and connect the
other end (3.5mm jack) into the AUX jack on the side of the unit.
2. Make sure your external music player is turned on.
3. Start music playback on your external music player.
4. Control the sound level from the AR-68.
If you don’t want to disturb other people during your listening, you can plug your
earphones/headphone into the PHONE jack. The audio from the speaker will be muted and you
can enjoy your listening from your earphones/headphone.
Establish a safe sound level: over time your hearing will adapt to continuous loud sounds and
will give the impression that the volume has in fact been reduced. What seems normal to you
may in fact be harmful. To guard against this before your hearing adapts, set the volume to a
low level.
Slowly increase the level until you can hear comfortably and clearly and without distortion.
Damage to your hearing is accumulative and is irreversible. Any ringing or discomfort in the ears
indicates that the volume is too loud. Once you have established a comfortable listening level,
do not increase the sound level.
ENGLISH
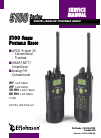
AR-68
www.akai-france.com
AR-68
USER MANUAL
Before operating this product, please read user manual completely